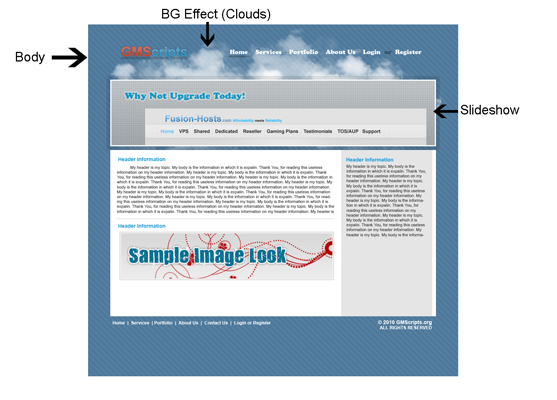
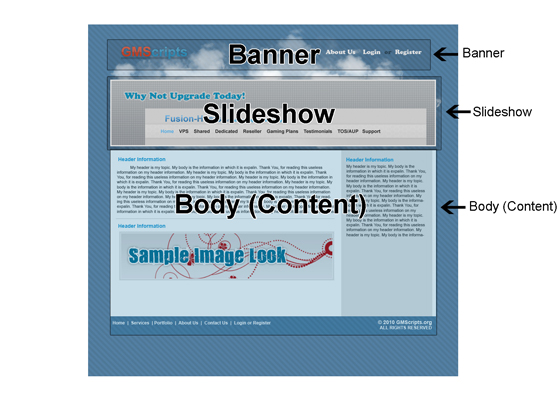
In this step we will begin by analyzing the design then creating a layout in the html in which we then will apply CSS too. By the ending of this step you will have a page with text just going down the side. With that being said it will look awful, so let’s begin.
Once again before I start, I would like to repeat that this design can be coded many ways, in which this is one of those many ways. The coding in this design only requires HTML/CSS and some JavaScript (slideshow). JavaScript will be covered very briefly in which you will not get a full in depth experience with it. So to start that’s figure out how we can layout out the images in the background.

If we look closely at the design we will notice there is at least 3 major images that can be seen. Starting from the bottom up we have the Body, which is the pattern in the background. Then we have the background cloud effect which we will call the BG Effect. Finally we have the Slideshow in which we will have rotating slides/images.

Now that we know our naming since on our major pictures we will then need to make out our sections. If you have not noticed, yet, in this design it has a fixed width and is centered in the middle of the page. Meaning we will need to align in the center and set a width. I know pretty redundant. Meaning we need to see how many sections we have. In this case I came up with three. We have the banner, which is at top. Next we have the slideshow right under it. And finally we have the body aka content. The reason I have these split up is because if you look at the banner and body then compare to the slideshow there widths will be different meaning they will be off. So to simplify I thought of using three sections.

So now we have the basic concept of our sections and image layout/setup. So now that’s put them to use. Firstly we will need to setup the basic of out html page. Basic meaning our doctype, html, head, title, Meta, and body tags.
<!DOCTYPE html PUBLIC "-//W3C//DTD XHTML 1.0 Transitional//EN" "http://www.w3.org/TR/xhtml1/DTD/xhtml1-transitional.dtd">
<html xmlns="http://www.w3.org/1999/xhtml">
<head>
    <meta http-equiv="Content-Type" content="text/html; charset=utf-8" />
    <title>GMScripts - The Next Generation</title>
    <link href="style/main.css" type="text/css" rel="stylesheet" rev="stylesheet" />
    <script type="text/javascript" src="http://ajax.googleapis.com/ajax/libs/jquery/1.4.2/jquery.min.js"></script>
    <script type="text/javascript" src="js/SlideShow.js"></script>
</head>

<body>

</body>
</html>
The reasons behind setting up the basics are pretty simple. We setup a doctype for the browser to know how to interpret the information. We do the basic tags html, body, head to make up our sections for our doctype. Then we setup a Meta for the type of data content, in this case we used "utf-8". Finally we setup a title which will be our name which is displayed in the browser tab.
Seems odd, right? Why do I need to setup my folder if I’m trying to code? Well we are setting up the folder to simplify any complications with this tutorial. Meaning if I link somewhere you can link to the same location. Also having a nice structured directory can help speed up updating and fixing problems.

In the picture above I have setup three folders which are named images, style, and js. These names are just as they say images for my images, style for my style sheets, and js for my JavaScript.
Now that I have given the gist of what we will be accomplishing I would like to give you all the images and a PSD so we can get started. Click Here to Download the Zip.
Now let’s begin by finding the <body> … </body> tags. We will be placing anything that follows into these tags to display to our viewers. So we know already where we are going to set the pattern we found in the Image Setup step. So next we need to work on our background cloud effect aka BG effect. So let’s start by making a div with a class of "bgeffect". Don’t forget to end the div.
<div class="bgeffect">

</div>
We will not worry about the slideshow as of yet because we know it is located in one section unlike "bgeffect" which was found in none of our specific sections. Meaning we will set the rest of the data within the div that we just setup to allow the div to cover the whole page area.